Creating and Deploying Promotions
Introduction
This topic covers setting up promotions in the XY POS system and the promotion deployment based on fixed amount or percentage-based offers.
Steps to Create and Deploy Promotions
-
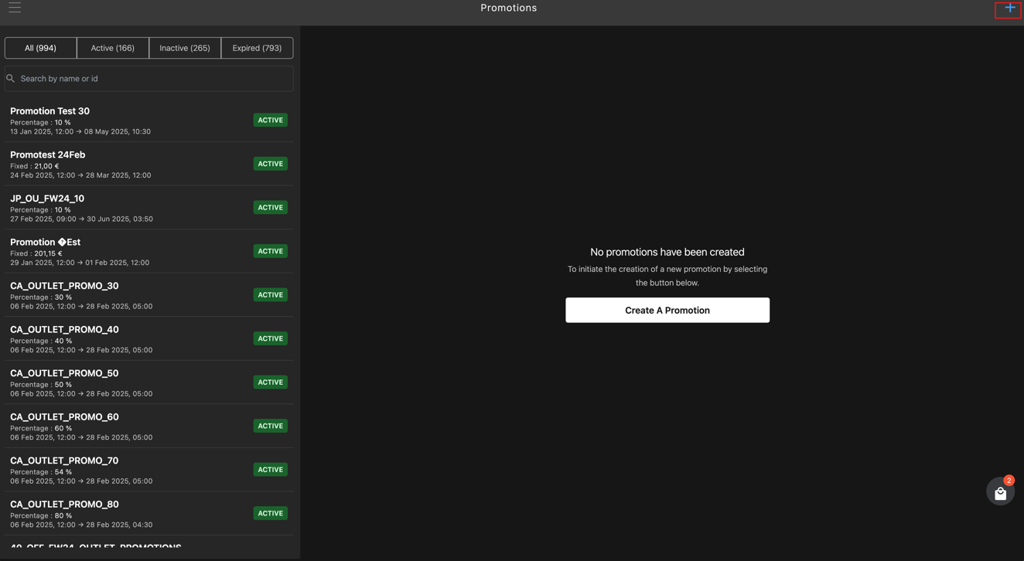
Click the burger menu.
-
Click the Promotions.
-
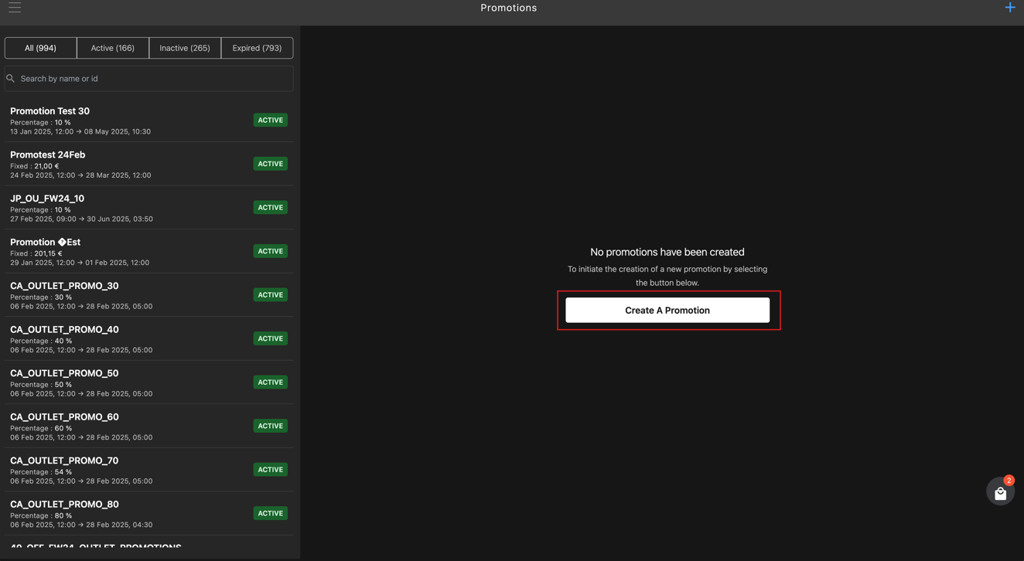
Click either the icon in the upper-right corner or the Create A Promotion button to create a new promotion.
OR
-
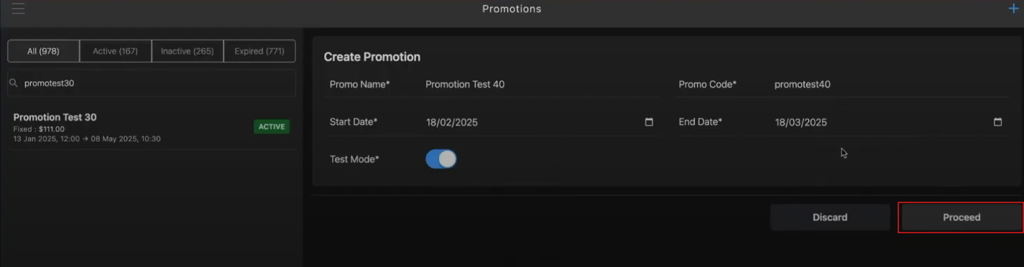
Enter the following in the Create Promotion section:
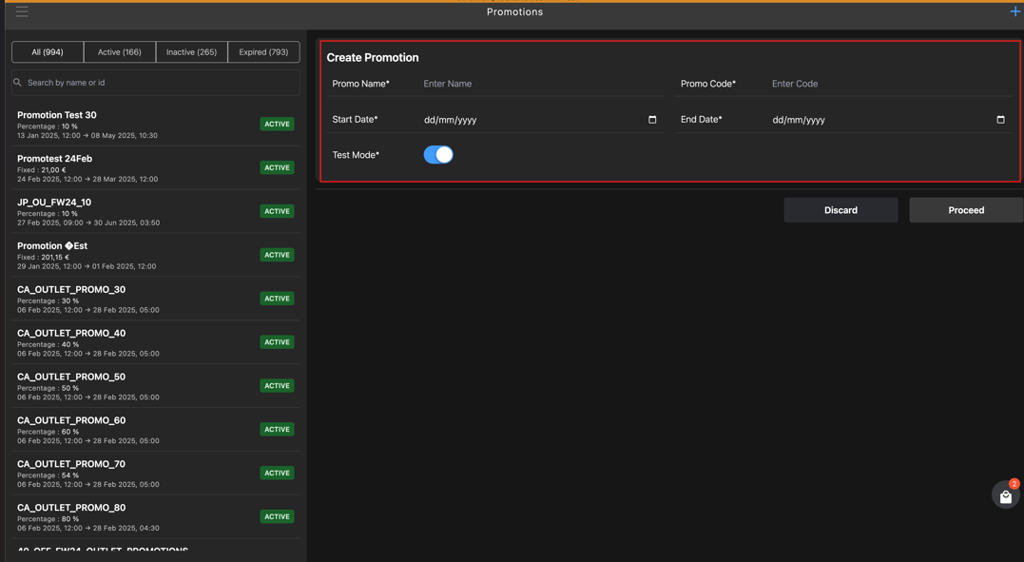
- Promo Name*: Enter the promotion name.
- Promo Code*: Enter a unique promotion code.
- Start Date*: Select the promotion start date.
- End Date*: Select the promotion end date
- Test Mode :
- Disable the toggle button to apply promotion for live store.
- Enable the toggle button if the promotion is applied to the test store.
Note: By default, the Test Mode toggle button will be in the ON position.
-
Click Proceed to save the promotion data.
-
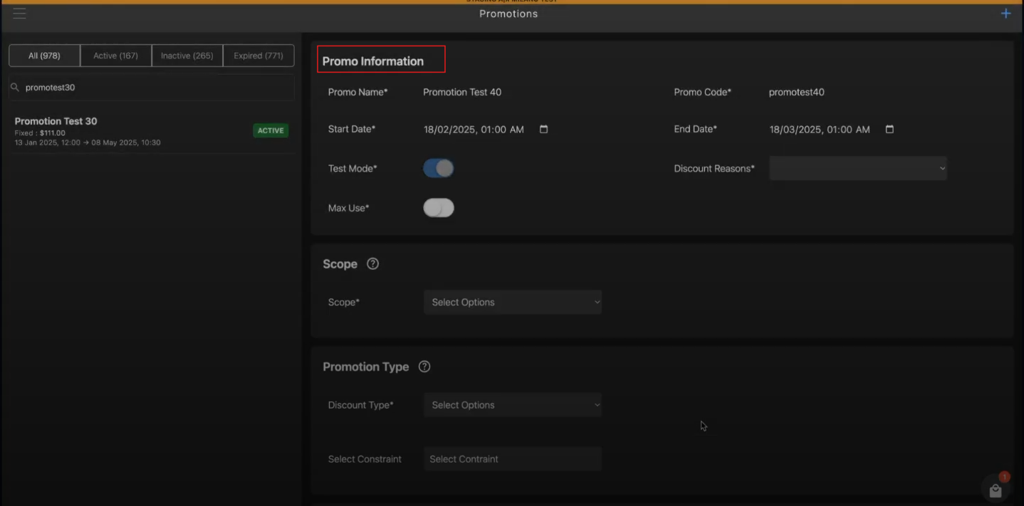
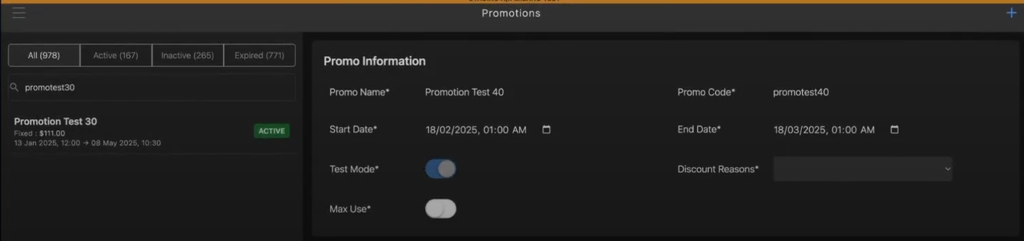
After saving the promotion data, the Create Promotion section will be updated to the Promo Information section.
-
Select a discount reason from the Discount Reasons* dropdown list.
-
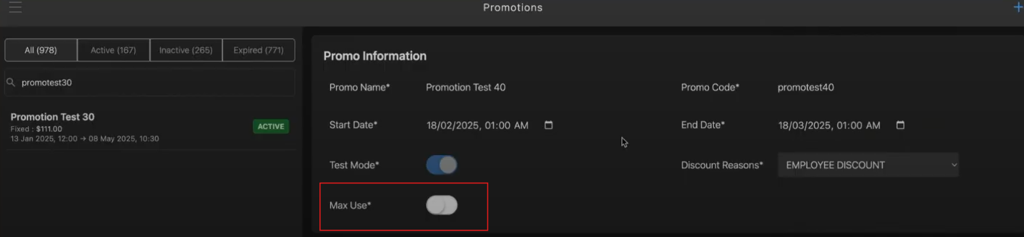
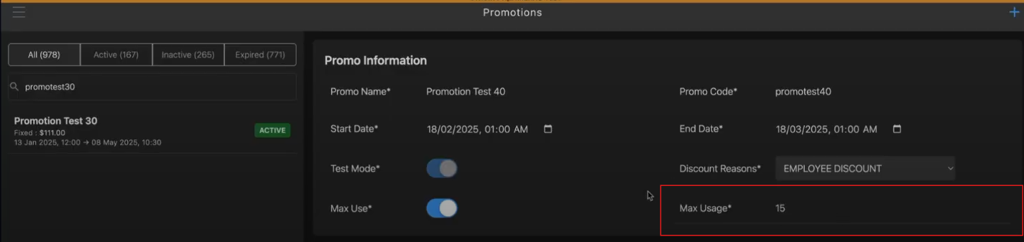
Enable Max Use* toggle button, if you want to apply maximum use condition to the promotion.
-
Enter a value in the Max Usage* field to define the maximum number of times the promotion can be applied.
-
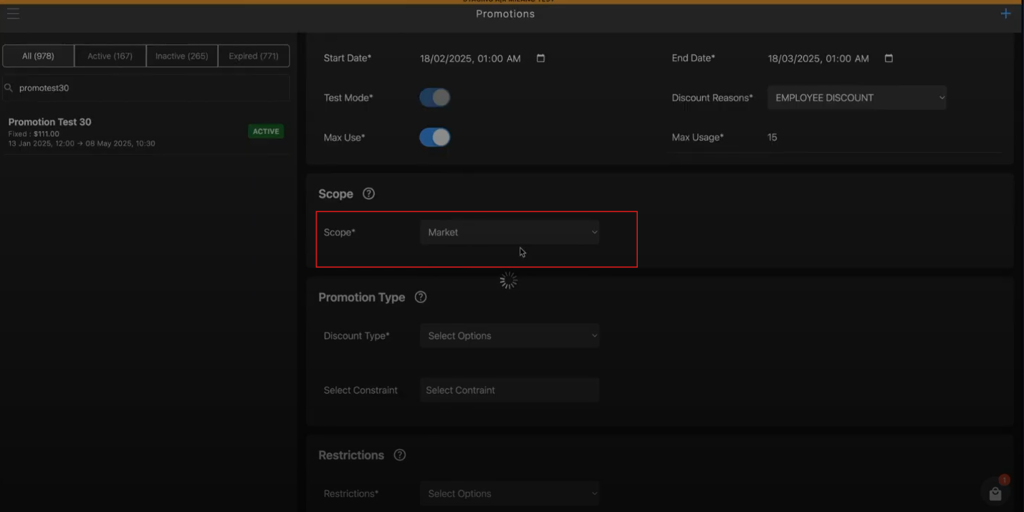
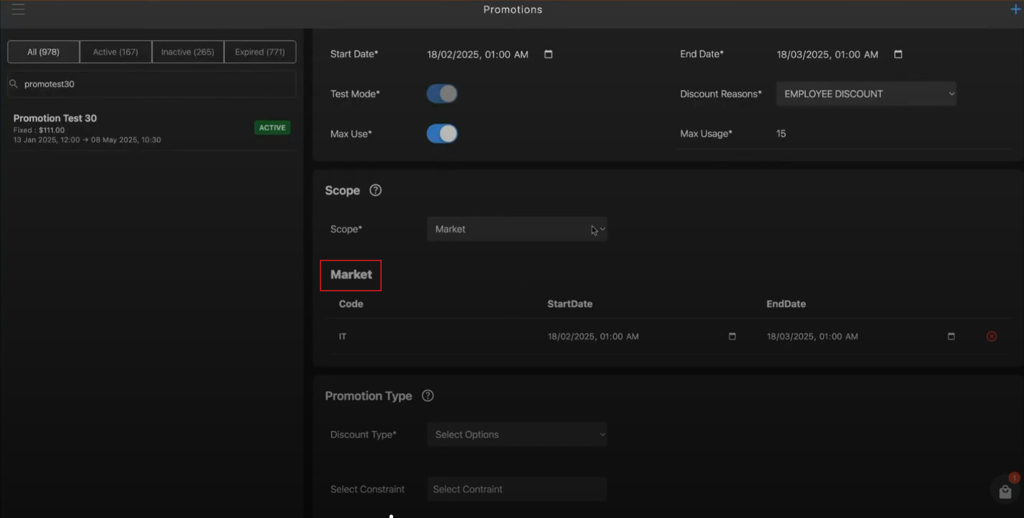
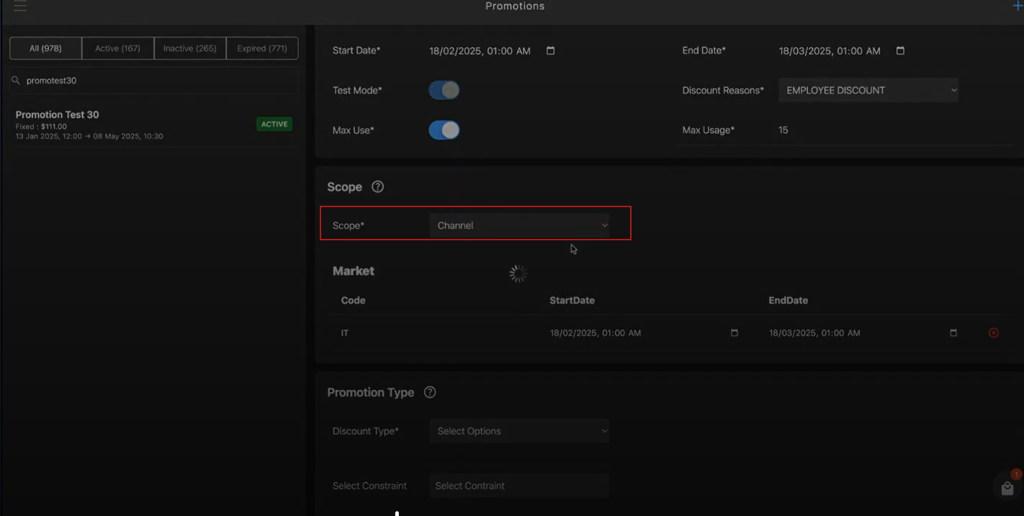
In the Scope section, click the Scope* dropdown list to select any one of the following options:
- Market: Market option refers to the various countries involved.
-
Select the Market option from the Scope* dropdown list.
-
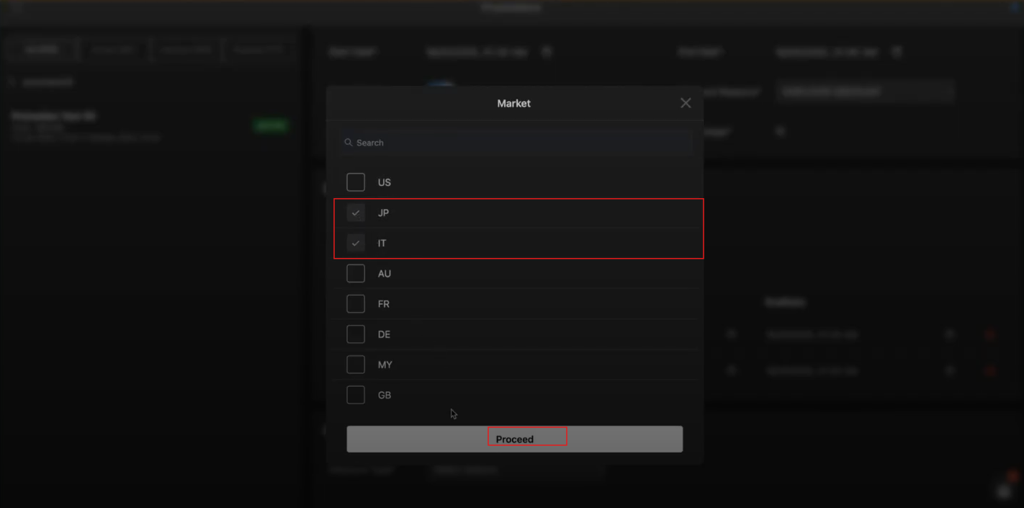
Enter the country name or code in the Market pop-up window search box.
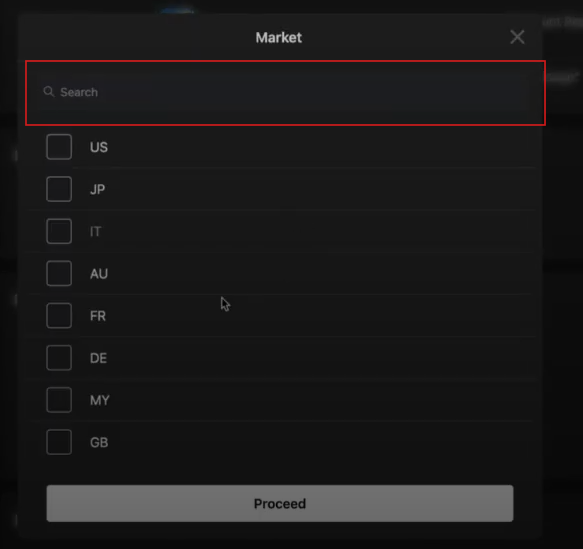
-
Select the respective market checkbox.
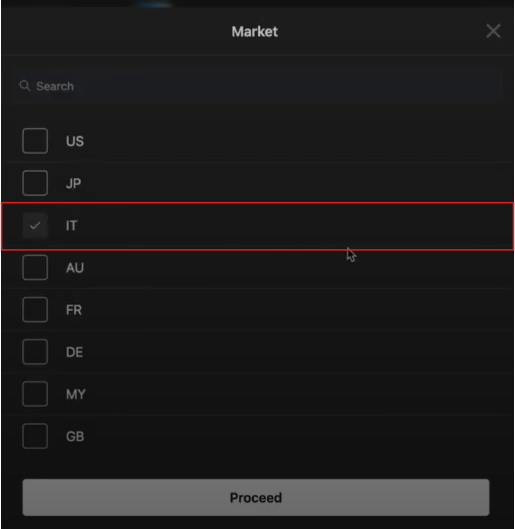
-
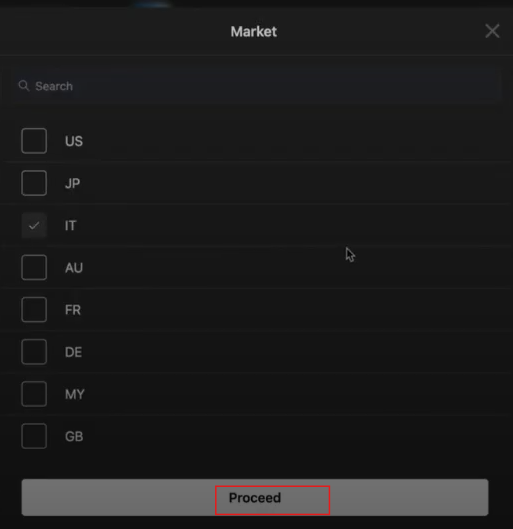
Click Proceed to save the Market data.
-
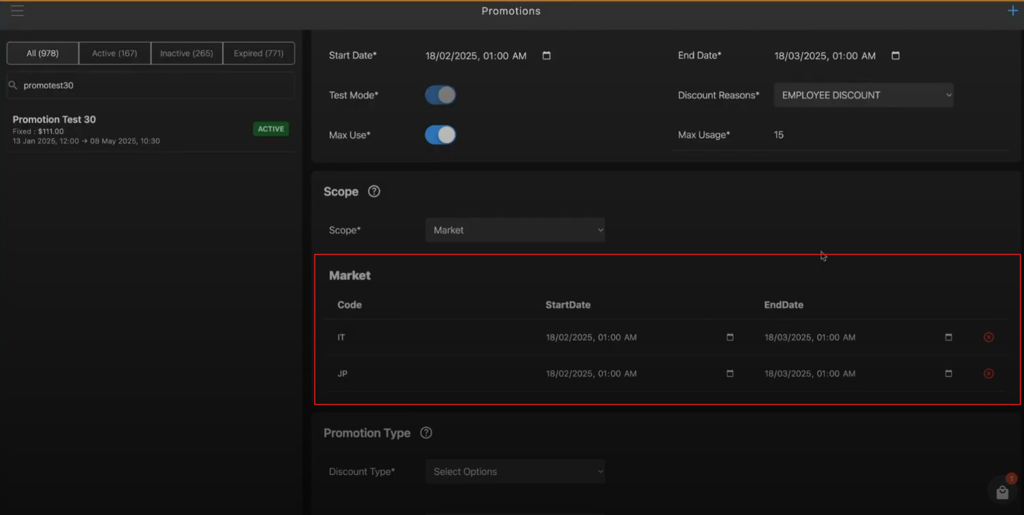
To apply the same promotions to multiple market, select the multiple market checkbox. (Optional)
-
In Market subsection, enter the following to apply the promotion to the selected Market:
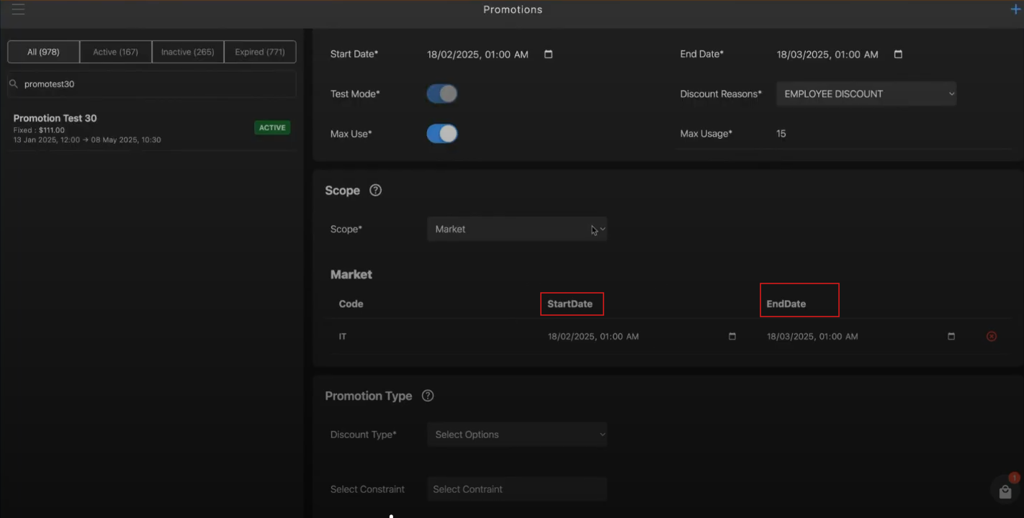
- Start Date*: Select the promotion start date.
- End Date*: Select the promotion end date.
-
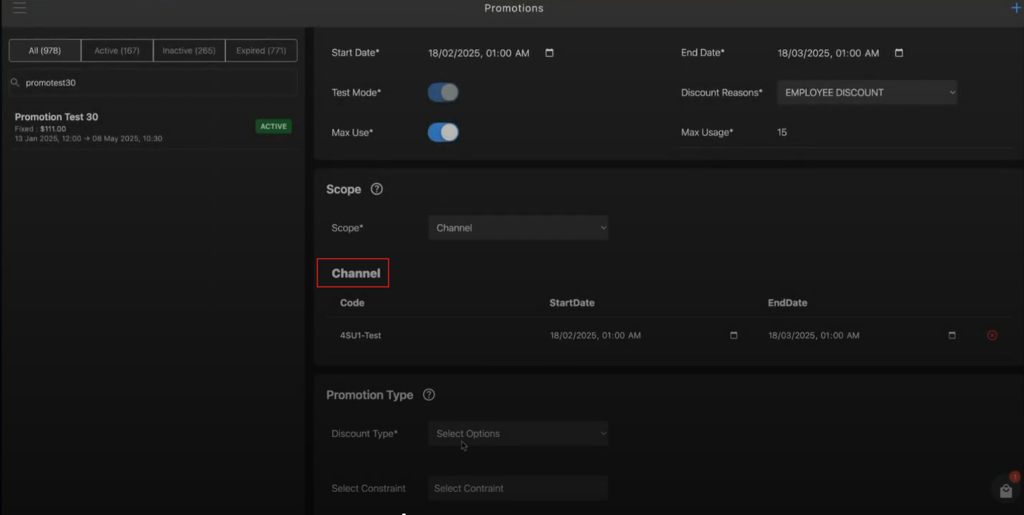
- Channel: Channel option refers to the various stores involved.
-
Select the Channel option from the Scope* dropdown list.
-
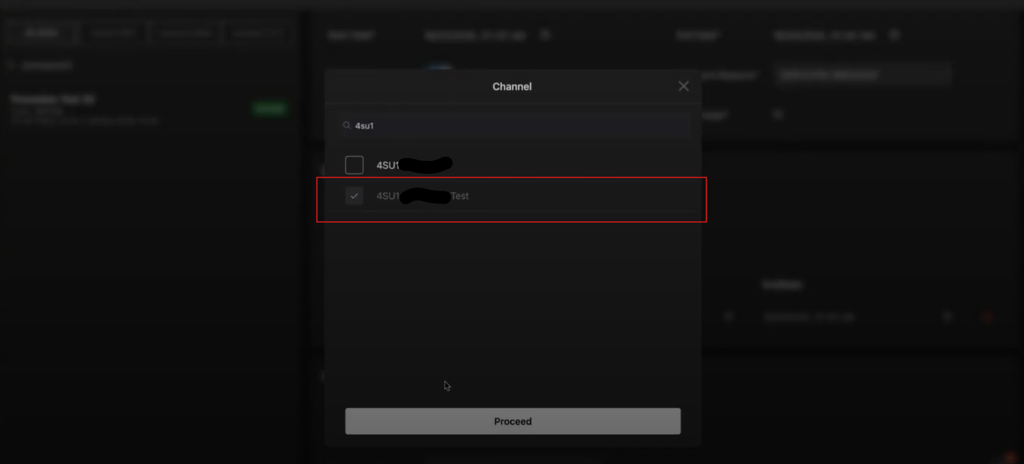
Enter the store name or code in the Channel pop-up window search box.
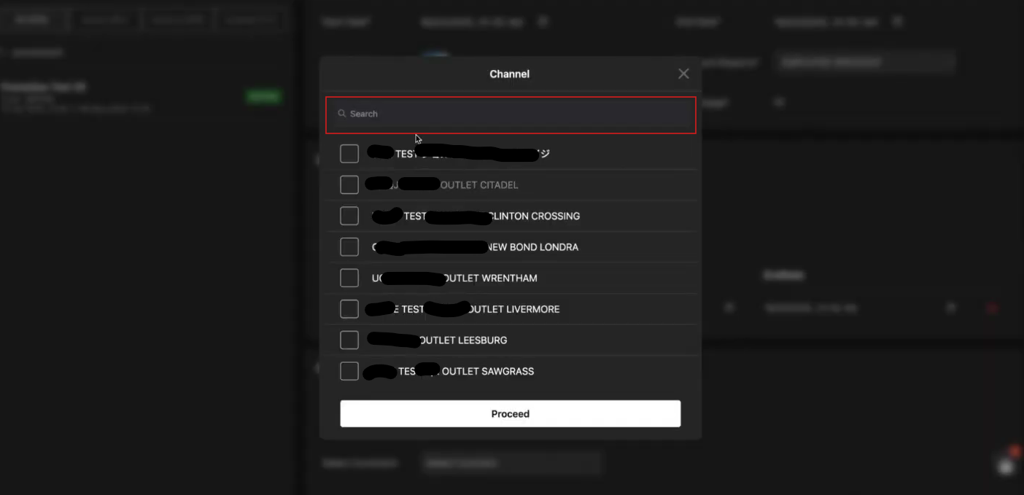
-
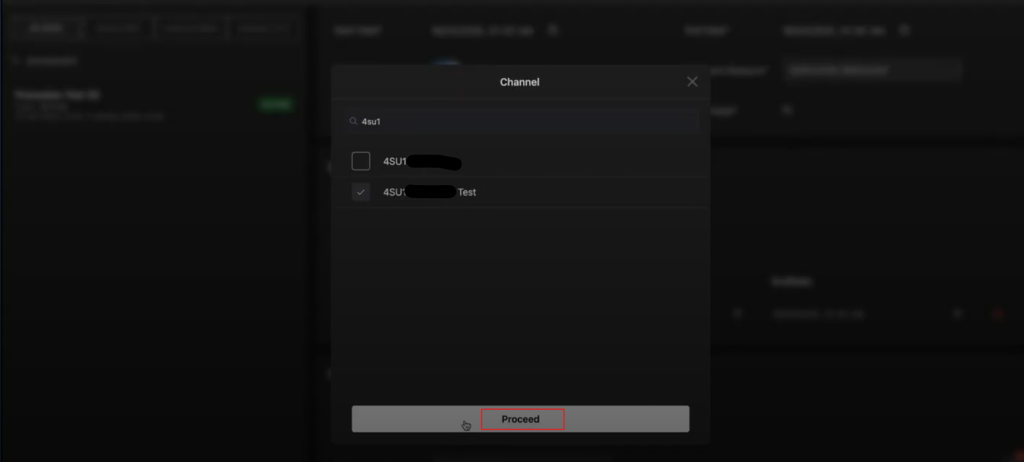
Select the respective channel checkbox.
-
Click Proceed to save the Channel data.
-
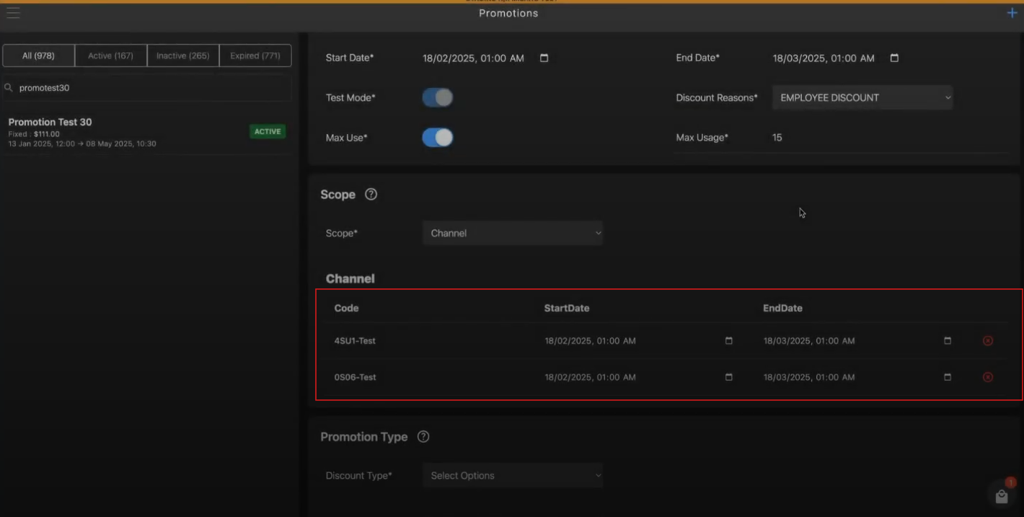
To apply the same promotions to multiple channel, select the multiple channel checkbox. (Optional)
-
In Channel subsection, enter the following to apply the promotion to selected channel:
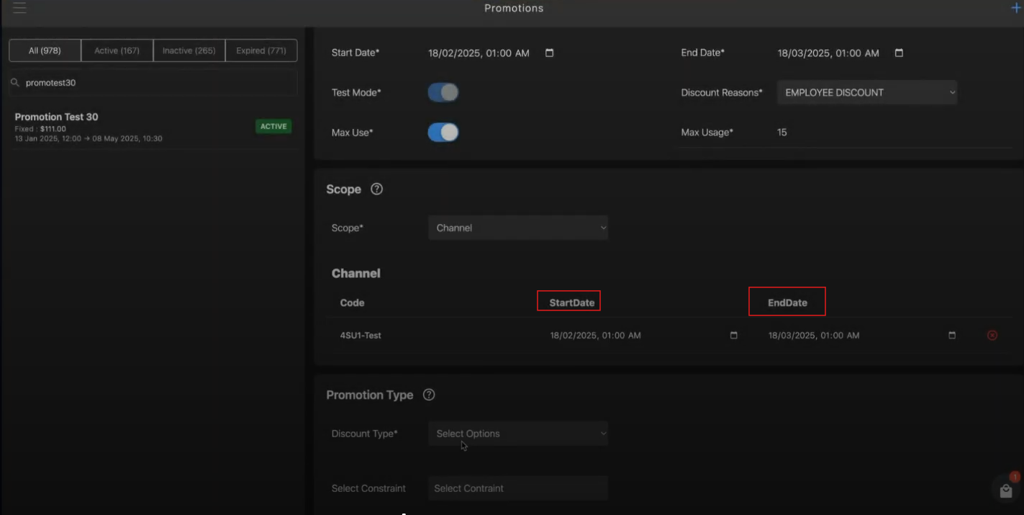
- Start Date*: Select the promotion start date.
- End Date*: Select the promotion end date.
-
- Market: Market option refers to the various countries involved.
-
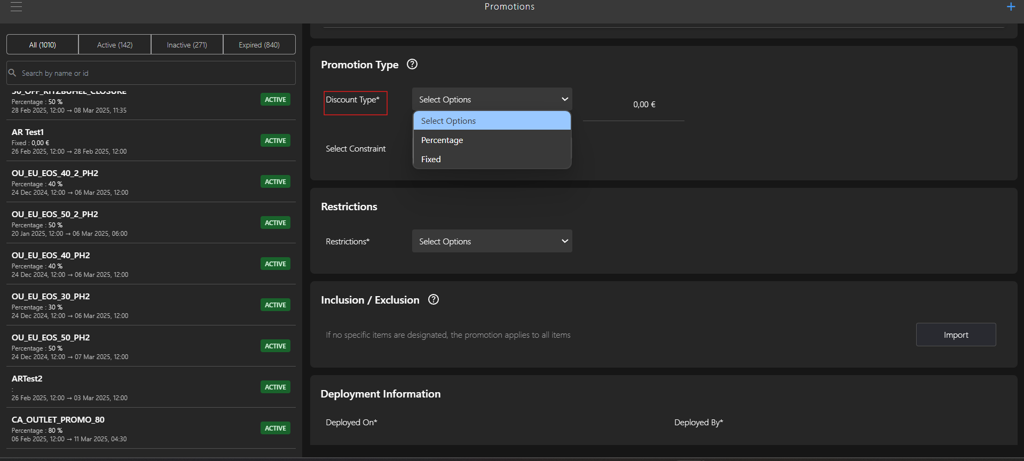
Select the following parameters in the Promotion Type section:
-
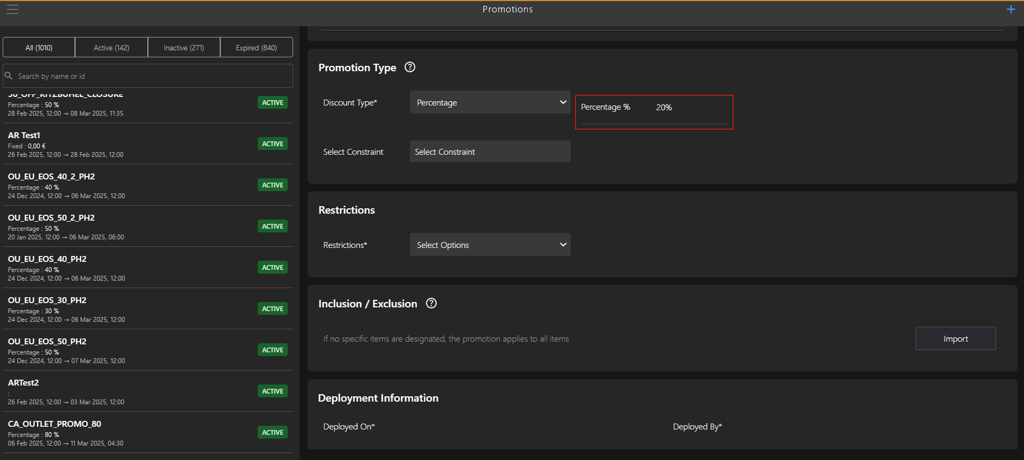
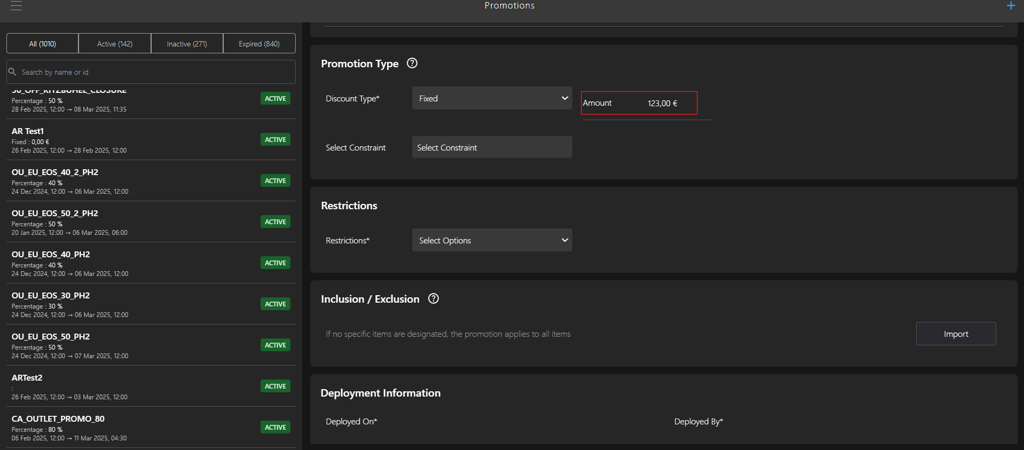
Select one of the following discount options for the promotion from the Discount Type* dropdown list:
-
Percentage: Enter the percentage value in the Percentage% field.
-
Fixed: Enter the percentage value in the Amount field.
-
-
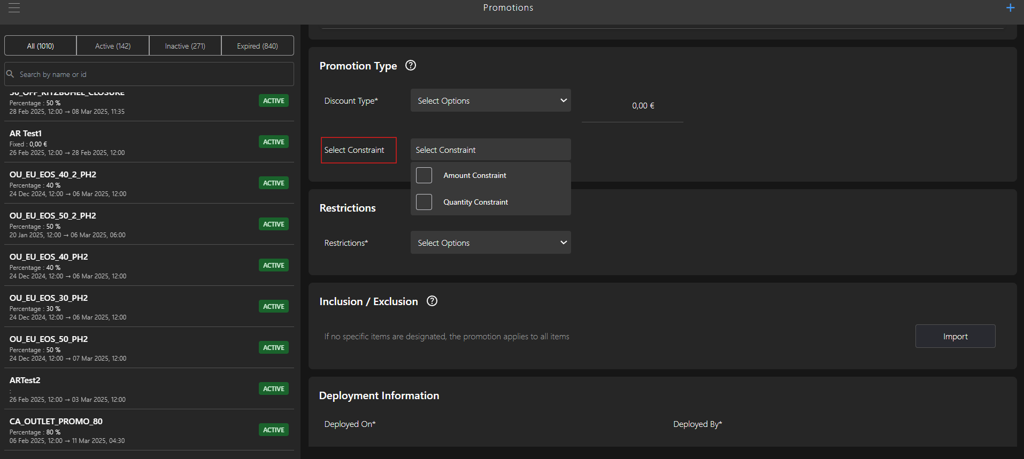
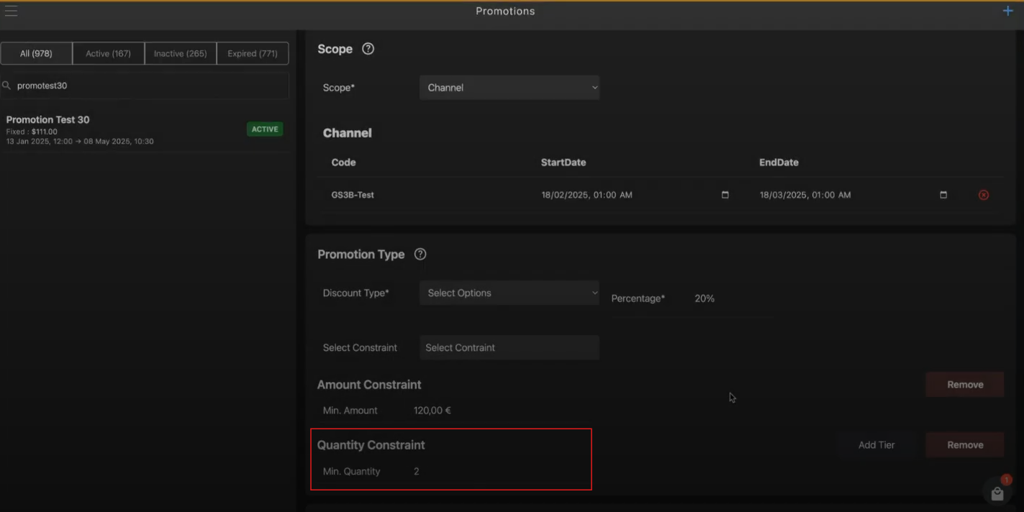
Select the following constraint options checkbox for the promotion from the Select Constraint* dropdown list:
-
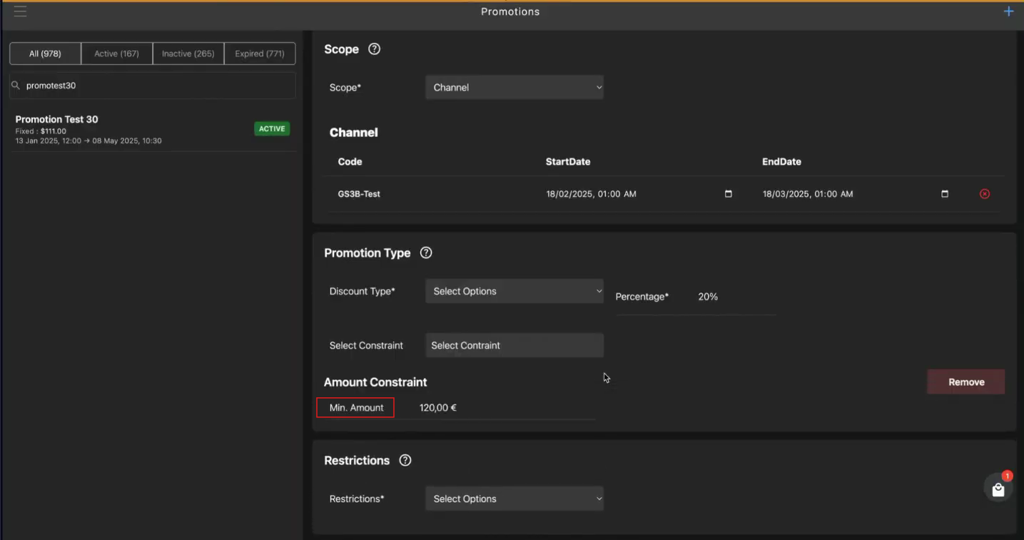
Amount Constraint: Enter the minimum constraint amount value in Min.Amount field.
-
Quantity Constraint: Enter the minimum constraint amount value in Min.Quantity field.
-
Click Add Tier, if you want to apply promotion with different quantity and percentages.
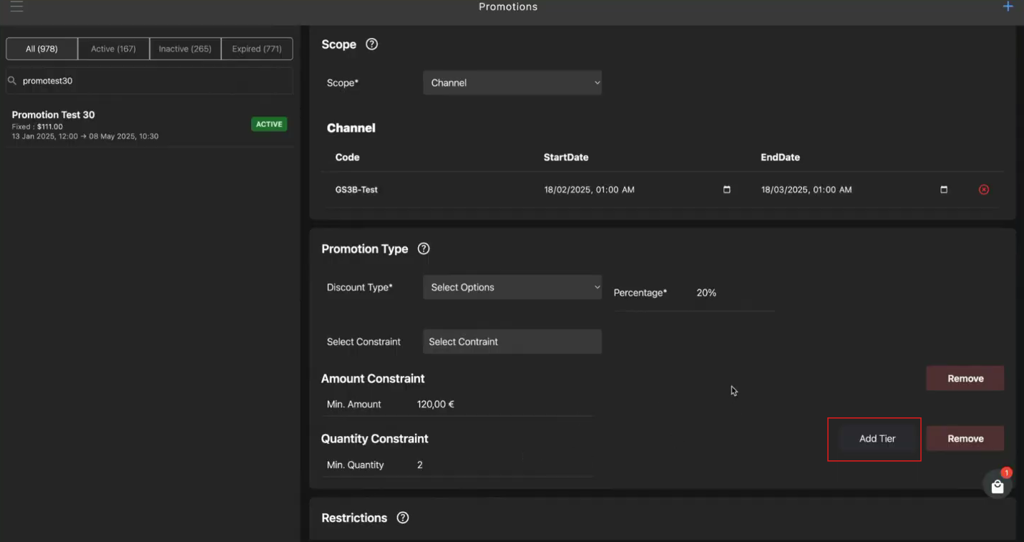
Note: The Add Tier becomes visible only after selecting Quantity Constraint option.
-
Enter the constraint amount value in the Min.Amount field and the percent value in the Percentage* field.
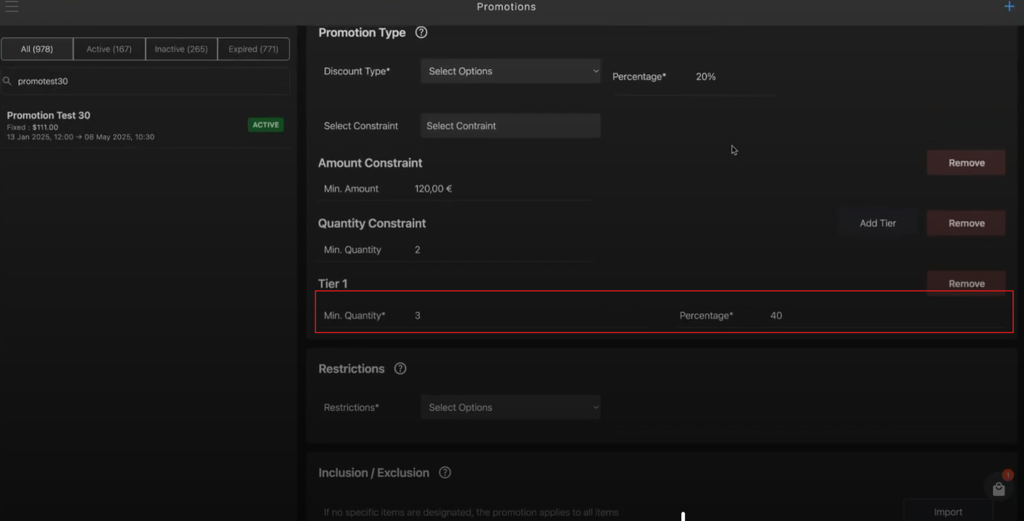
Note: You can apply multiple Tier conditions to the promotions.
-
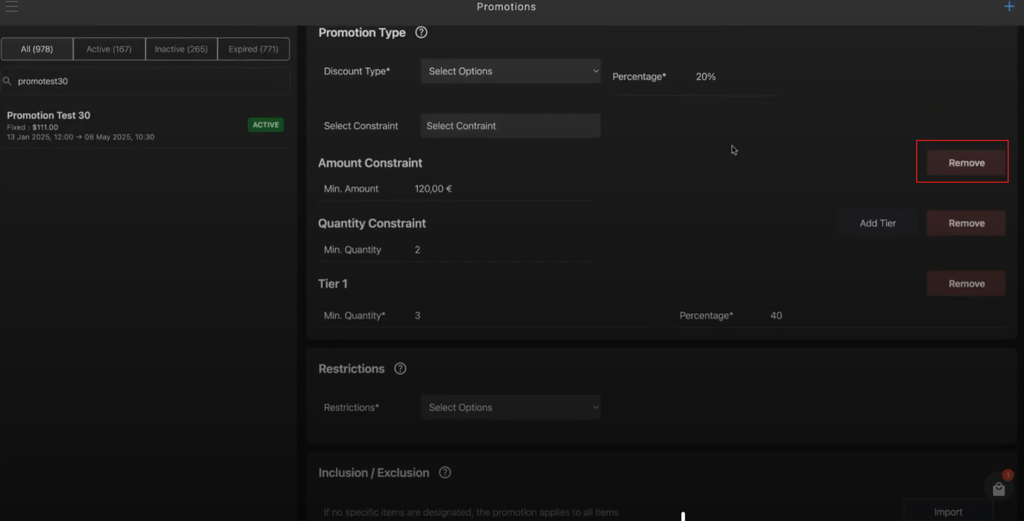
Click Remove to remove the applied promotion constraints.
-
-
-
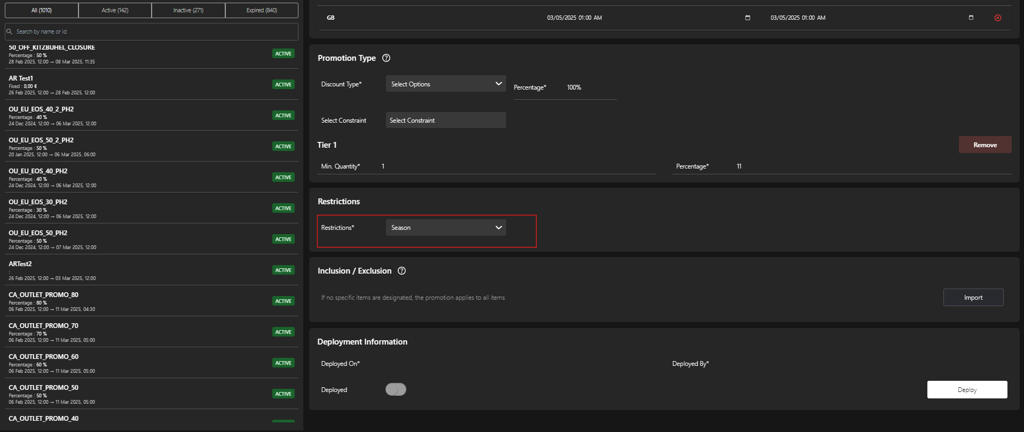
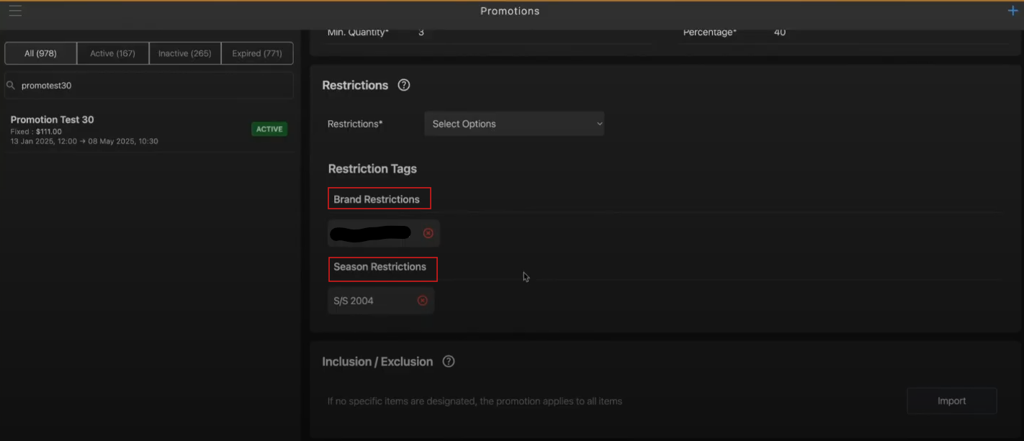
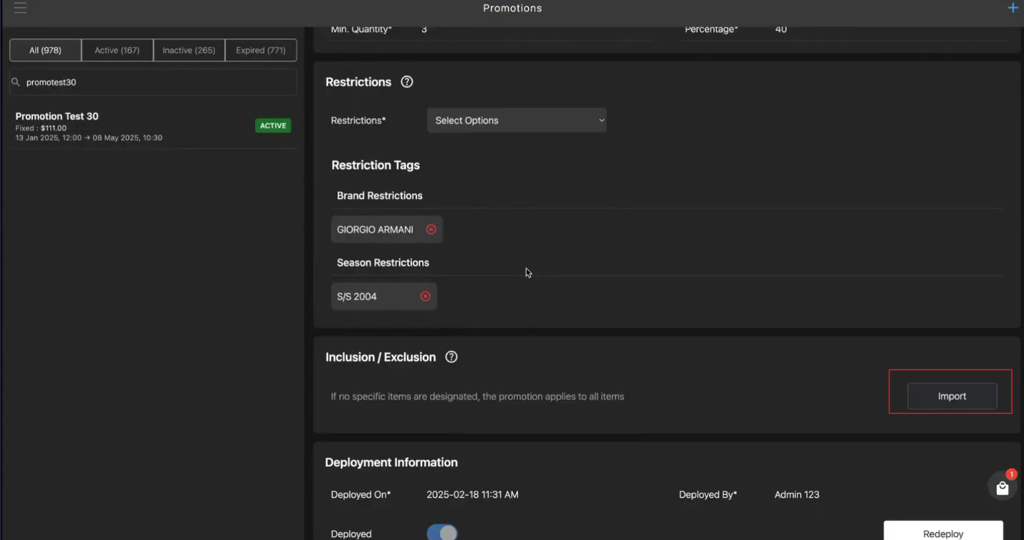
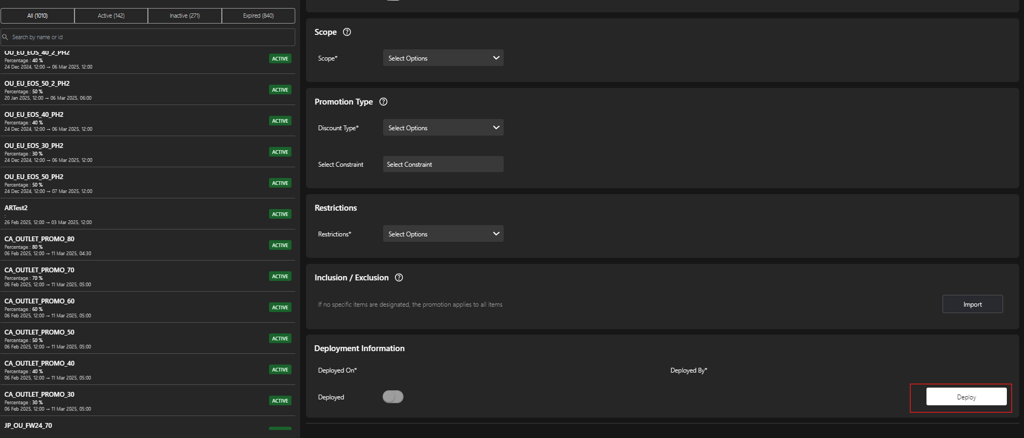
In the Restriction section, select an option from the Restriction* dropdown list to exclude it from the promotion, for example, Season.
-
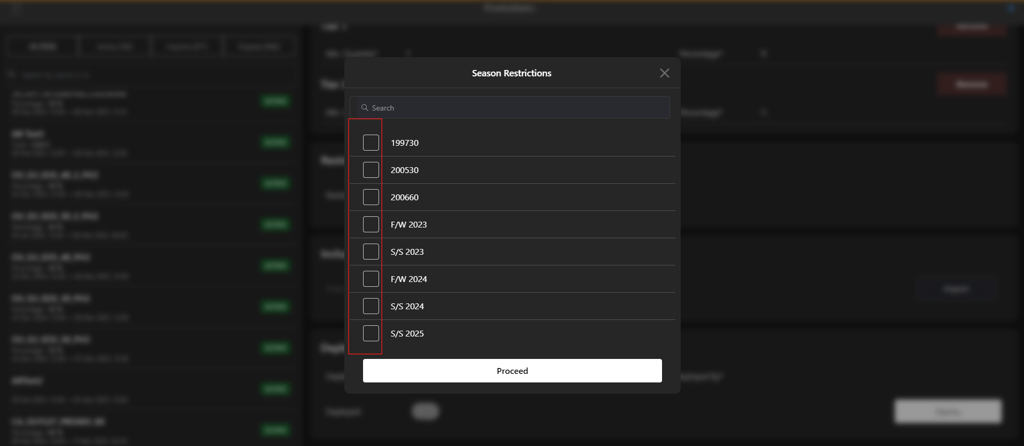
Select the respective checkboxes you want to restrict in the pop-up window, for example, Season Restrictions.
-
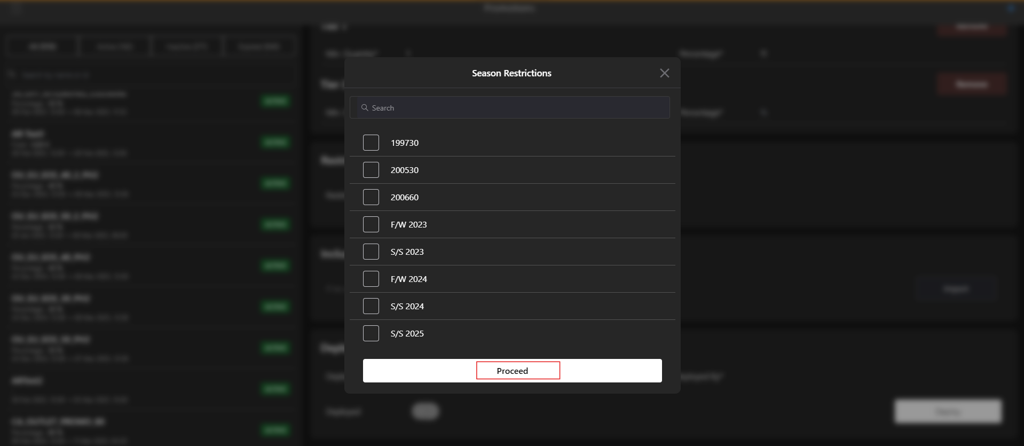
Click Proceed to apply promotion restriction for the selected option.
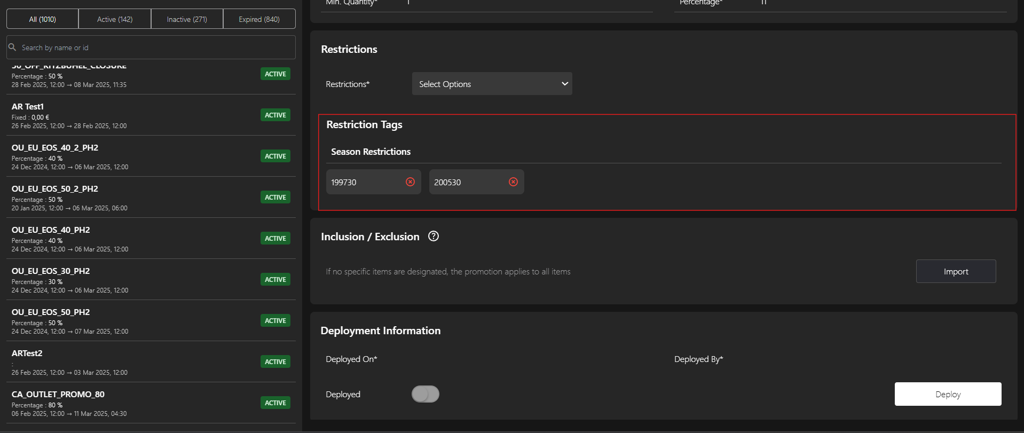
-
To apply multiple restriction repeat the steps from 12 to 14. (Optional)
-
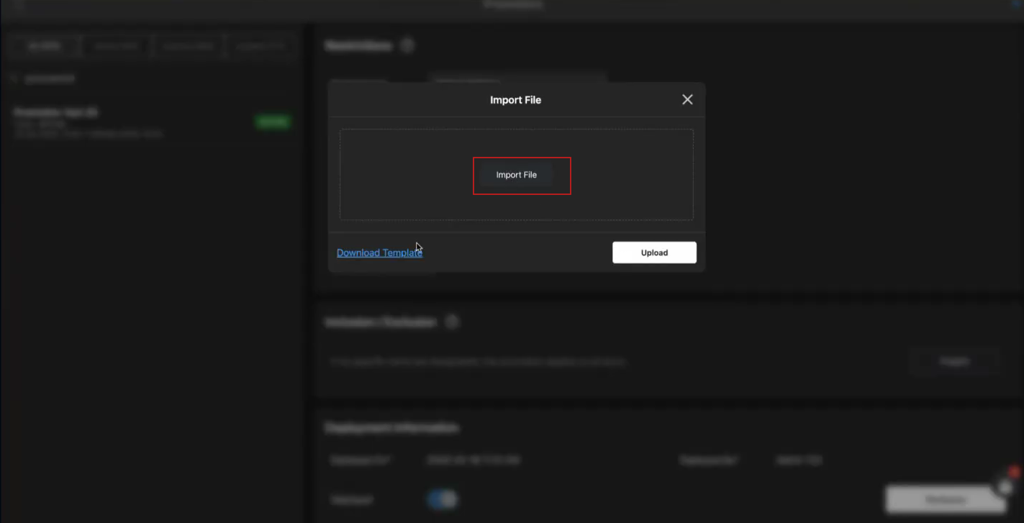
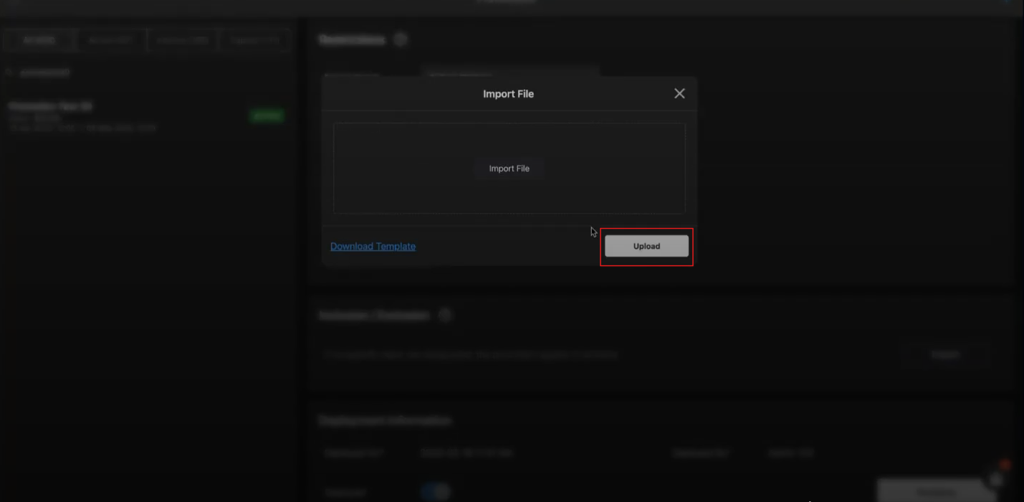
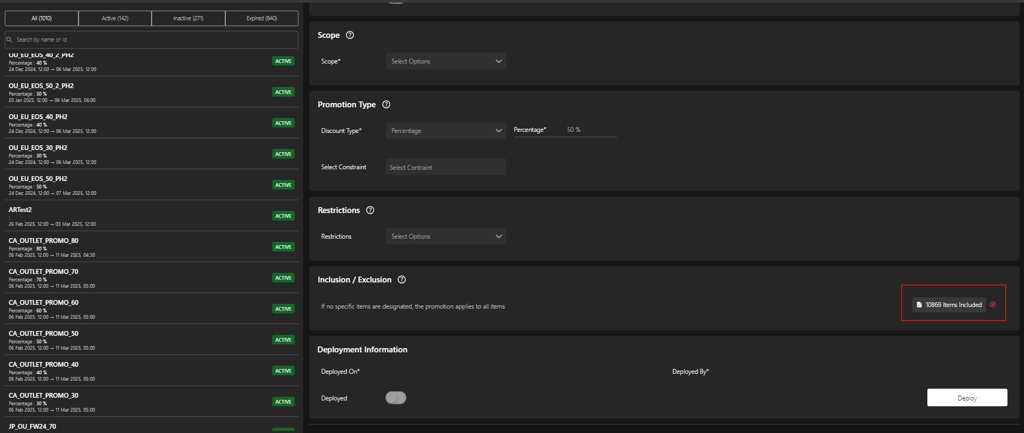
Click Import in the Inclusion / Exclusion section to add or exclude items from the promotions.
-
Click Import File button in Import File pop-up window.
-
Select the Inclusion and Exclusion Excel file from the local computer
-
Click Upload.
-
Click Deploy in Deployment Information section to activate the promotion.
-
The POS system automatically records the following parameters in Deployment Information section:
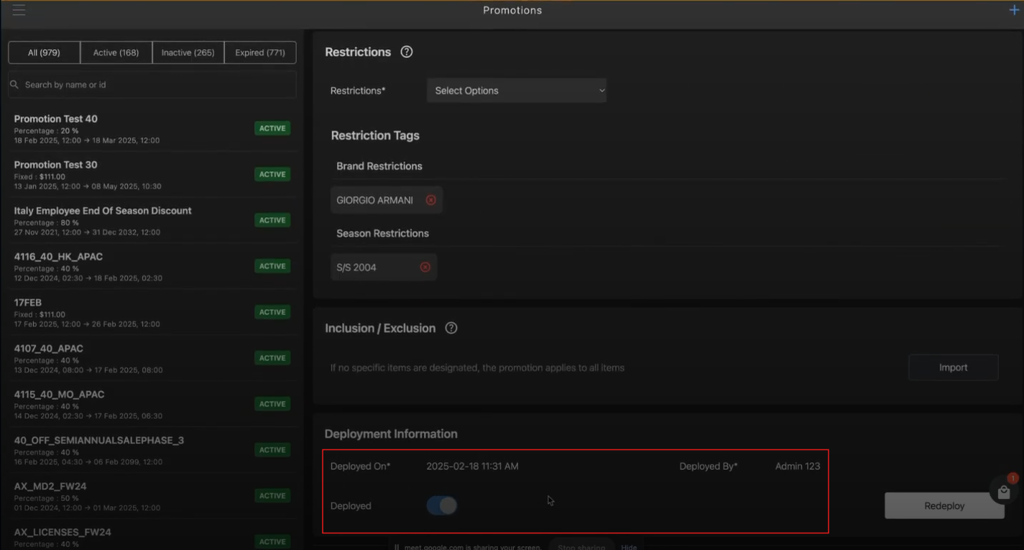
- Deployed On: The date and time of the deployment.
- Deployed By: The user or system that performed the deployment.
- Deployed: After successful deployment, the Deployed toggle button is enabled.